Your Guide to Downloading Images from Your Pixieset Photo Gallery: A Step-by-Step Tutorial
Are you eager to access and save the stunning images from your recent pet photography session? Look no further than this step-by-step guide for downloading images from your Pixieset photo gallery. In this comprehensive tutorial, I'll walk you through the simple process, ensuring you can enjoy your cherished memories for years to come.
Effortlessly access and preserve your cherished memories with these simple download instructions
Last month, I shared an article about the pros and cons of digital photos and made a strong case for choosing to print images from your professional photo session. But there is a place for digital files - they are an excellent way to back up your images, save them for printing in the future, and share them on social media. If you missed the article, you can check it out here.
When you invest in printed photos from Stephanie Lynne Photography, you also get the web-quality digital file of that image to share on social media, and, depending on what you purchase, you may even get your entire gallery of pictures included with your package! I used to deliver these digital files by USB, but USBs have become less effective with rapidly changing technology. Some newer computers don’t even have a USB port, and smartphones and tablets don’t either!
I have been using a platform called Pixieset, offering a modern and easy-to-use client download experience. With Pixieset, you can easily download images from your online gallery to your device, Google Photos, or Dropbox. Your private, password-protected gallery is perfect for viewing, sharing, and downloading your new photos.
Let’s get started!
STEP 1: Opening your Pixieset Gallery
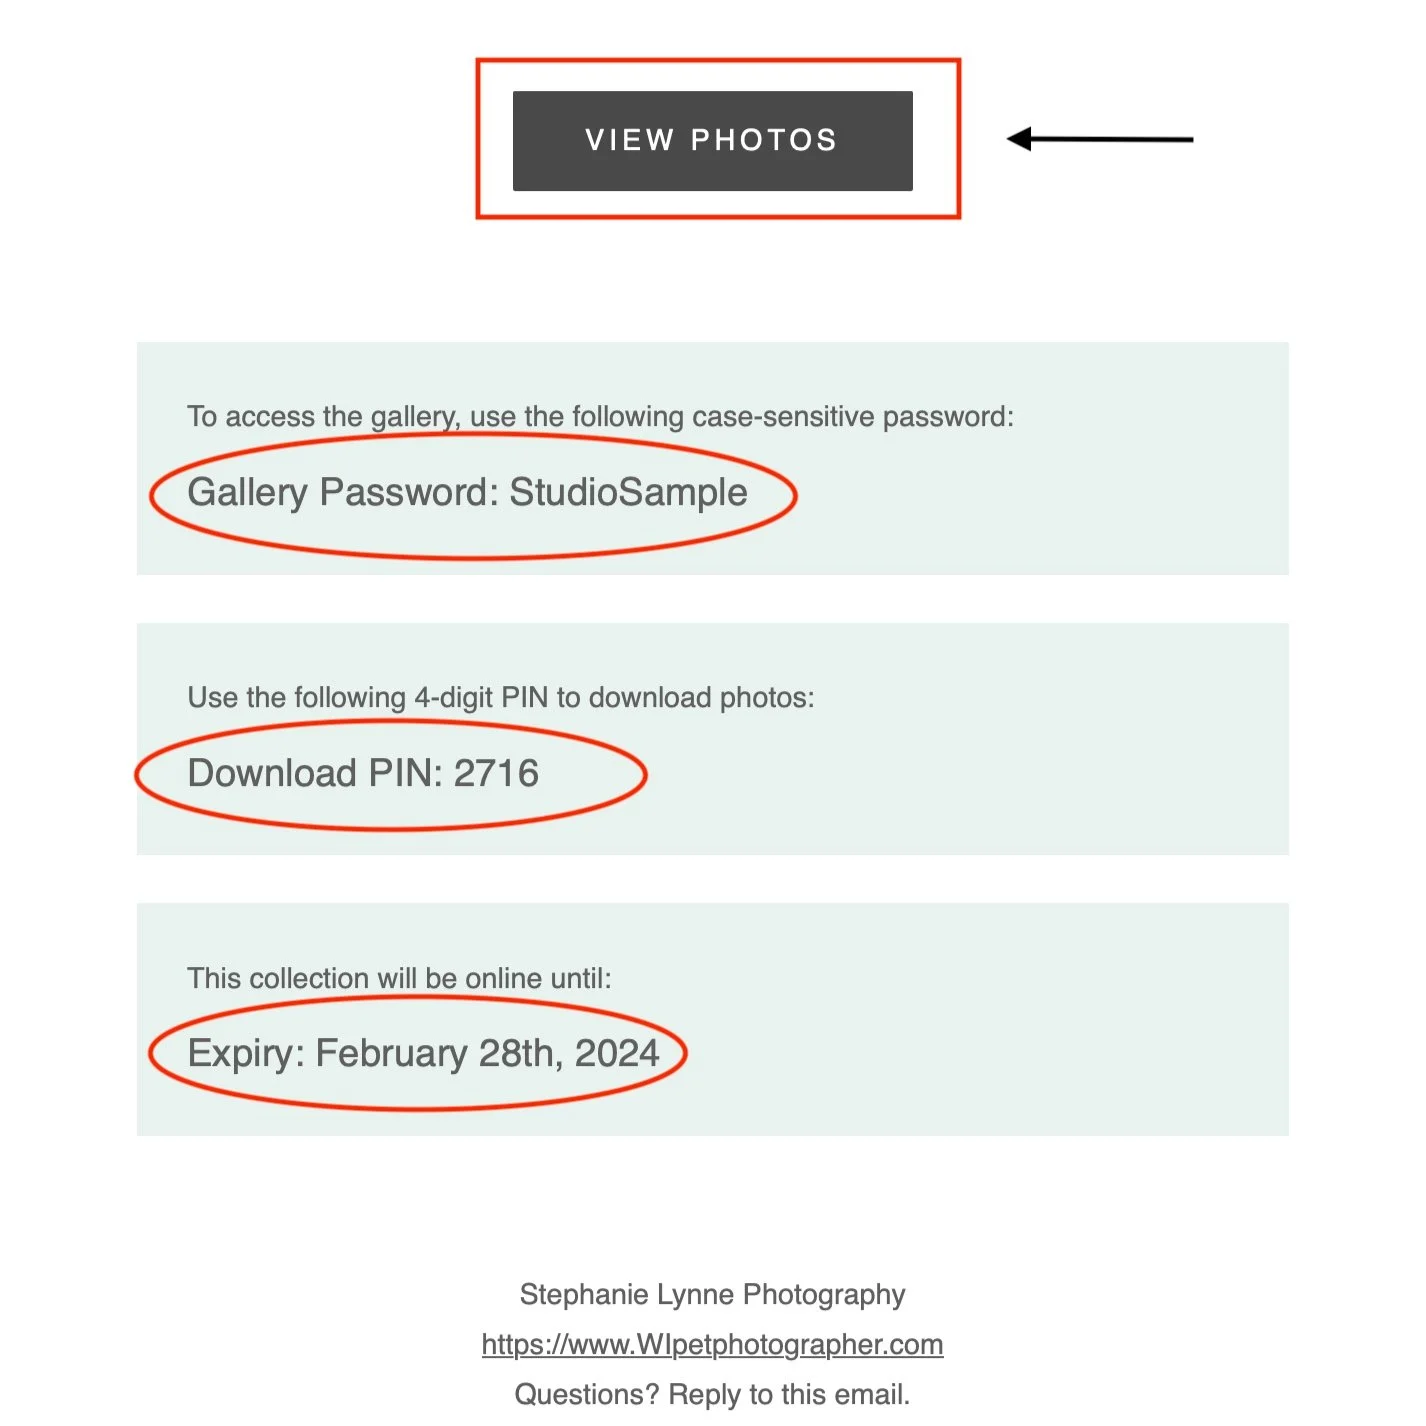
This is an excerpt from the email you will receive when your new gallery is delivered straight to your inbox. Don’t see it? Check spam/junk folders - those spam filters are sometimes a bit aggressive.
Click the button ‘VIEW PHOTOS’ to access your gallery
You will need your Gallery Password (it is case-sensitive)
You will need your 4-digit Download PIN to download photos
Be sure to download your new images to your computer’s hard drive and mobile devices before the gallery expiration date.
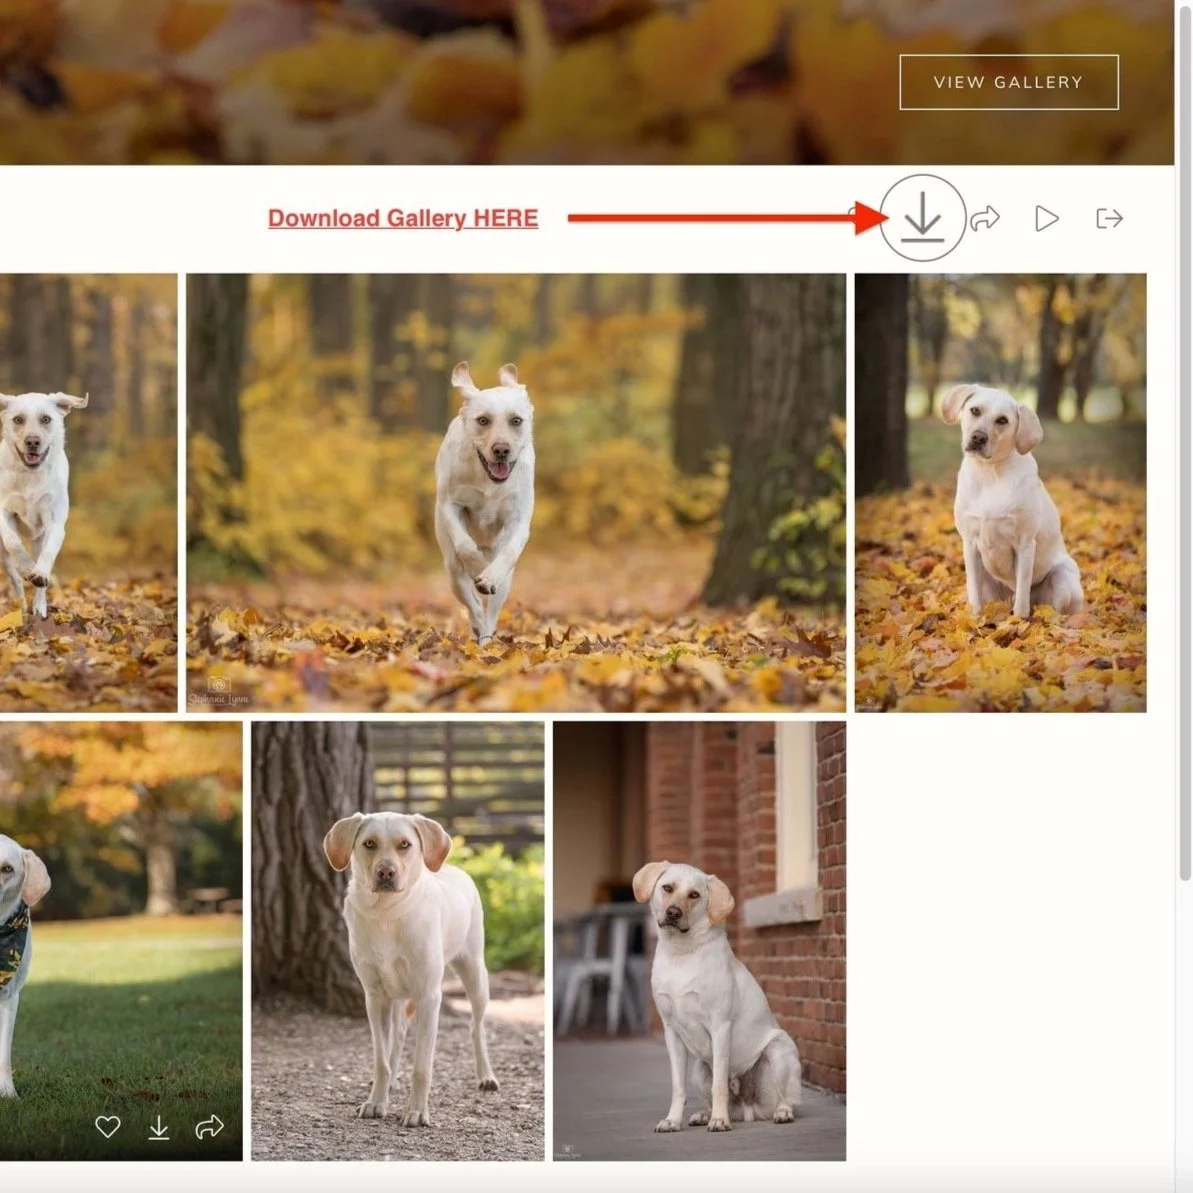
STEP 2: Downloading your Gallery
Click on the DOWNLOAD icon at the top right corner of your photo gallery. This will download your ENTIRE GALLERY of images.
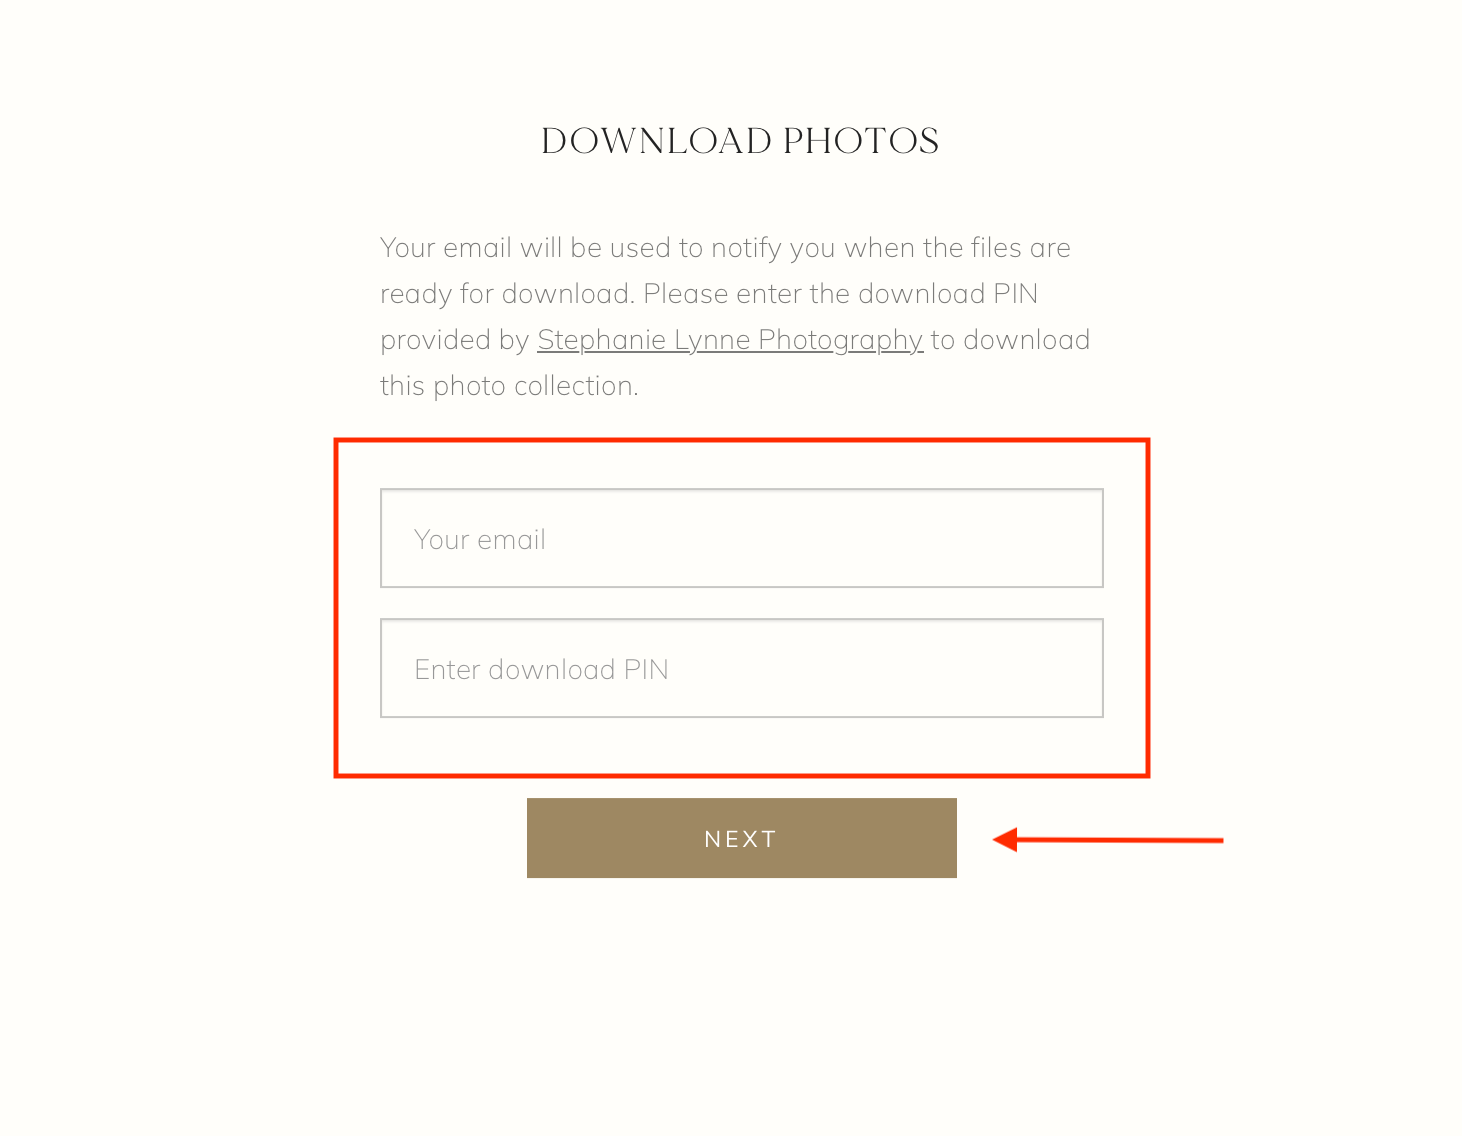
STEP 3: Access your Download
Enter your email address and 4-digit Download PIN where prompted.

STEP 4: Download Settings
You are downloading your entire gallery in this step, so the ‘photos’ box should be checked. If it isn’t, go ahead and check it now. Note: you will see the total number of photos included in your gallery to the right of the ‘photos’ checkbox.
Choose the download size:
If your gallery includes both the High Resolution and Web Size digital files, you will see both of these options here.
Start with the High Resolution download, then go through these steps again to download the Web Size digital files. REMINDER: High Resolution is for printing up to 16x24 and Web Size is for sharing on social media, emailing to friends and family or using as screen savers.
If your gallery only includes the Web Size digital files, you will only see that option here. You can download your Web Size gallery to your device using these steps.
Download to…
You have three options when downloading your digital files:
Download to your device (desktop computer, laptop, mobile device, etc.)
Save to Google Photos
Save to Dropbox
Your Download PIN will allow you to download your gallery five times, so please feel free to download to a hard drive, your mobile device(s), AND Google Photos or Dropbox. These are great ways to back up your files if your hard drive fails or your mobile device is lost or damaged.
SAVING TO YOUR DEVICE: Once you click START DOWNLOAD, you will see the message box below. You can stay on the page while your files are downloaded or use the link containing the .ZIP folder, which will be emailed to you when the download is ready.
SAVING TO GOOGLE PHOTOS OR DROPBOX: The images will be available to view/download in your Google or Dropbox account(s).

Make it stand out
Whatever it is, the way you tell your story online can make all the difference.
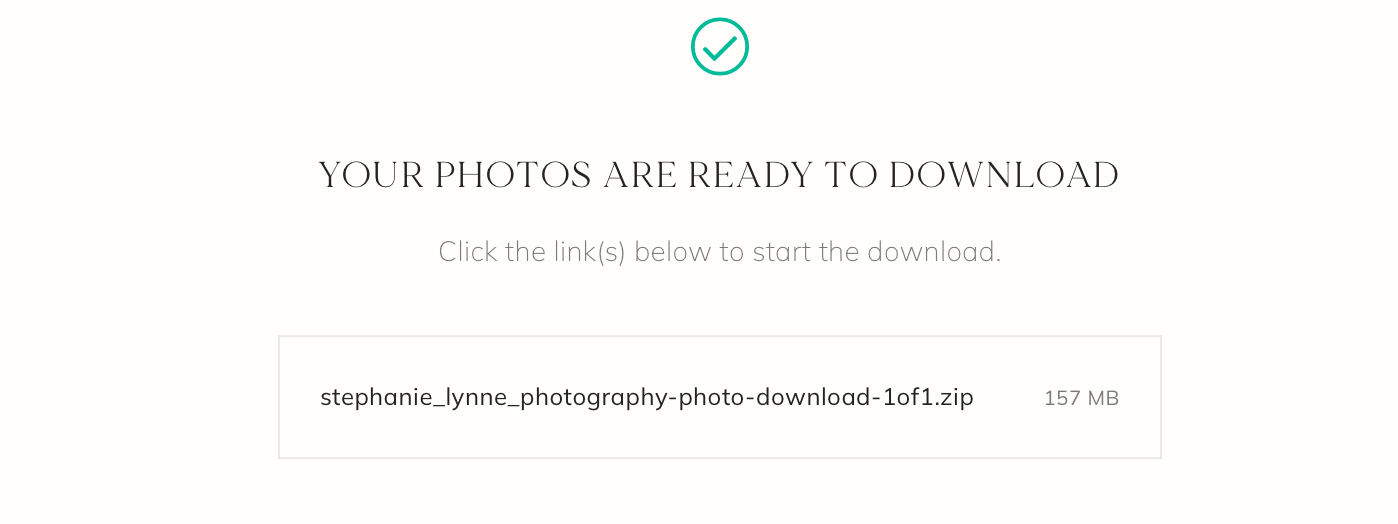
STEP 5: Opening your .ZIP download folder on your PC, Mac or mobile device
When the download file is ready, you will see this message. Click the link to unzip/extract the download to save the image files.
For more information about opening .ZIP files on your computer, check out the .ZIP troubleshooting guide below.
Help! I can’t open the downloaded .ZIP file.
When you download your entire gallery, the images are delivered in .ZIP format. Most computers will already come with some sort of unzip program, in which case you can follow a couple of quick steps, and your computer will start the unzipping process automatically.
If you are using a Mac Computer:
Locate the Downloaded .ZIP file in your Mac’s downloads folder
Double-click the file. Your Mac will automatically unzip the files so the images can be viewed and saved to your Pictures folder.
If you are using a PC/Windows Computer:
Locate the Downloaded .ZIP file
Right-click the .ZIP file
Select “Extract All” or “Extract Here”, and the contents of the .ZIP file will be extracted as a normal folder so the images can be viewed and saved to your Pictures folder.
If the computer does not have a built-in program for compressed (zipped) folders, there are numerous free unzip software options that can be downloaded and installed.
Enjoy your new images, and please get in touch with me with any questions or concerns or for assistance with cropping and printing images.